Departments
Search
Follow Us
Tags
Latest Highlights
IBH
Creating a Log Cabin Quilt Block
A log cabin quilt goes back ages and ages. I don’t know who invented it or originally designed it, but it was probably someone looking to use up bits and pieces of material.
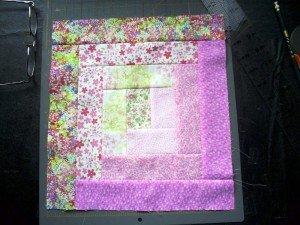
Surprisingly, making a log cabin quilt block is simple IF you can cut and sew straight! It’s also a great way to use up small pieces of leftover fabrics. The block shown uses seven different materials. In this block, I’m using 2 inch (5.1 cm) strips or logs, and a 2 x 3 inch (5.1 x 7.6 cm) rectangle for the center because I want my finished quilt to be rectangular.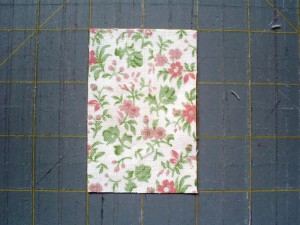
It is imperative that your center piece is exactly straight. If it’s off, everything else will be too, and you’ll end up with a parallelogram instead of a square or rectangle!
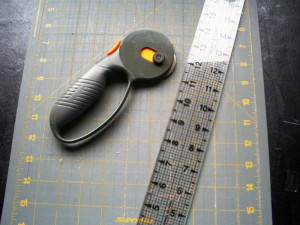 The absolute easiest way to accomplish this is with a rotary cutter and it’s matching board and ruler. These tools are certainly your friends when you need things to be perfectly straight. Step one is to cut all of your materials – your center square or
 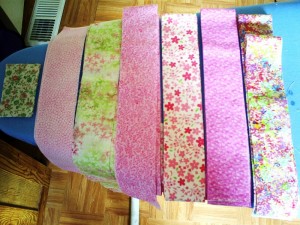 rectangle, then three or four strips of each of the materials you will be using. Then lay out your materials in the order they’ll be sewn together. You’ll be starting at the center and working outward from there. If you are not sure in what order the fabrics will be sewn, once everything is cut, you can lay them out around the center piece until you like what you see.
Starting with the center block, line up and sew the first strip to it making a 1/4 inch (.6 cm) seam. Lay the piece down on your cutting board and cut off the excess of the strip even with the edge of the block. Iron the seam away from the center.
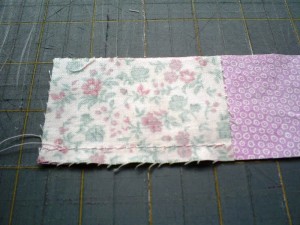 Using the same log (strip), align it exactly with the bottom of the piece you just sewed. You want it exactly even with the center block edge. Sew it using a 1/4 inch seam as before. All of the strips will be used twice. Cut off the excess and return the unused portion to its pile.
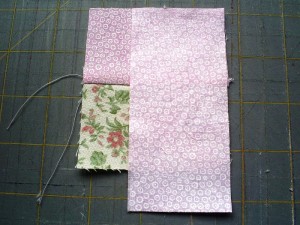
Take the next log and align it exactly with the third edge of the center block, sew it with a 1/4 inch seam, cut the excess, press the seam away from center, then align the same strip with the fourth edge of the center block and repeat. You’ve now gone all the way around center with fabric in either a clockwise or counter-clockwise fashion. It doesn’t matter which you choose, but you must continue around in the same direction until you’re all done.
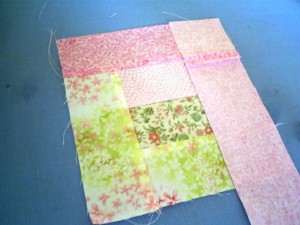 Always align with the straight edge of the log attached to the center, not the edges of the perpendicular logs. If they’re a little short or long, it’s not an issue. It’s aligning to center that will keep your quilt block square. And remember that this is a quilt… a collection of lots of different pieces of fabric. If one of the logs is too short, it’s absolutely okay to piece two logs together into one bigger log.
When you’ve used all of your logs twice, you’ll have a finished log cabin quilt block which looks like this from the back. Note how all of the seams are parallel to each other. This block has two logs which have been pieced together, too.
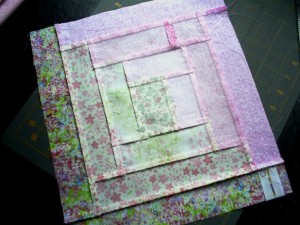 Continue making blocks in this manner until you have enough for your quilt, then sew all the blocks together. You can sew the blocks to each other, or you can use a strip of material to separate the blocks (I’m partial to the latter).
Tags: fabric, Handmade, handmade quilt block, log cabin quilt block, material, quilting, scrap material, sewing, vintage quilt, yardage
Posted in Handmade Mode, Promote Handmade, Tutorials
6 Responses to “Creating a Log Cabin Quilt Block”
Leave a Reply
You must be logged in to post a comment.


Great tutorial Sandi! Thanks for sharing 😀
I admire anyone who does quilting! I can do rag quilts and that’s it. Great tutorial.
You are so right in getting the fabric cut exactly! Once in a while when I’m not concentrating I find I have made a ‘rectangle’ instead of a square! FYI – when learning the log cabin method I was told the ‘center’ is called the ‘chimney’ – which then came up with the name “log cabin”!
I love quilts. Both of my Grandmothers quilted. They are so warm and special. Thanks for sharing Sandi. Great turorial!
[…] Go to Source Author: iKnitQuiltSew […]
[…] Go to Source Author: iKnitQuiltSew […]