
Departments
Search
Follow Us
Tags
Latest Highlights
IBH
Taking Your Online Store to the Street – You’ve Been Accepted! Now What?
 You got that email/letter/phone call, and WHOO-HOO, you’ve been accepted to that perfect-fit show! And then panic sets in…
Not to worry! You should have some time between now and then to get organized. You’ll need to remodel your business into a whole new venue. A good place to start is to take a mental tour of your inventory. What is it that you sell and how do you display it in person? In cyberspace, your ‘display’ is single-item photos. In person, everything you own will be visible all at once. Does everything you have go together in one category? Or is your inventory in several different-but-similar categories? How does what you have group together? Do you have hundreds of items or just a few? Are your items all the same relative size, or does it vary? Do your items have height or do they lay flat? Close your eyes and visualize everything you have as if it were sitting on a table and you’re standing 15 feet away… What do you see?
If your immediate answer was, “What a mess!” – relax – you’re not alone. Let’s consider displays one step at a time.
Take a selection of your items and put them on a flat surface. To see your things, do you need to be standing next to the flat surface looking down? If that’s the case, you definitely need to add some height or lift to you items. Here’s an example…
I’m a customer walking by in the aisle about ten feet from the front of all the booths. When I walk past your booth, this is what I see…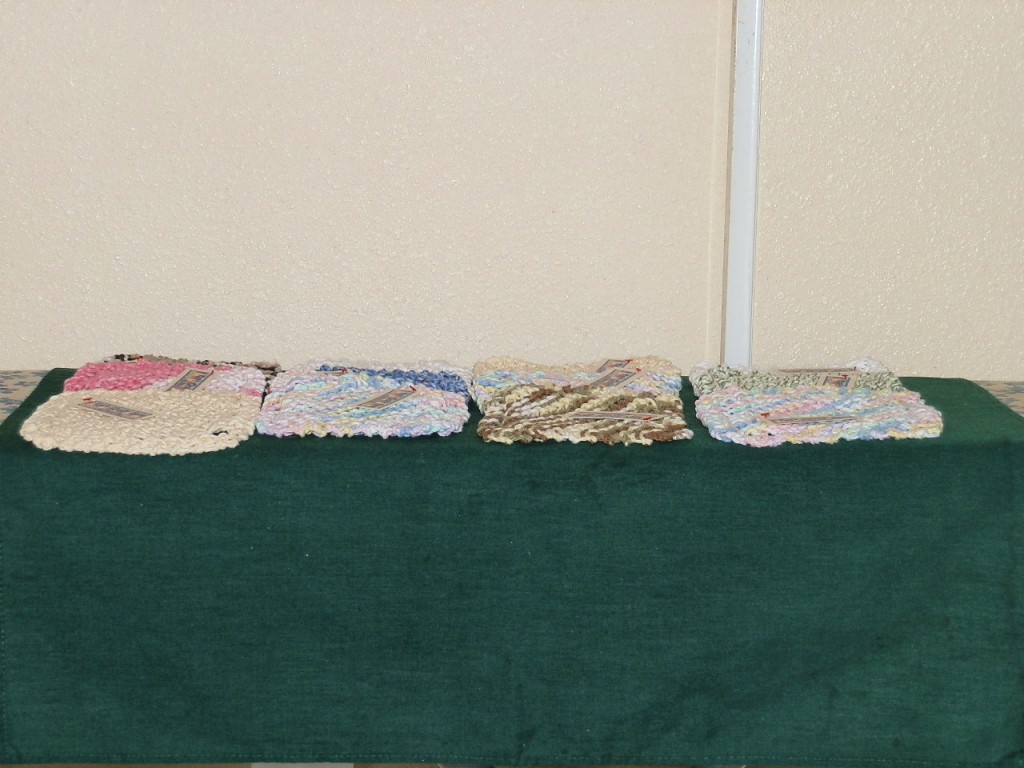 Not very enticing. And with lots of booths, not likely to attract enough attention to get anyone to stop. But if my display looks like this…
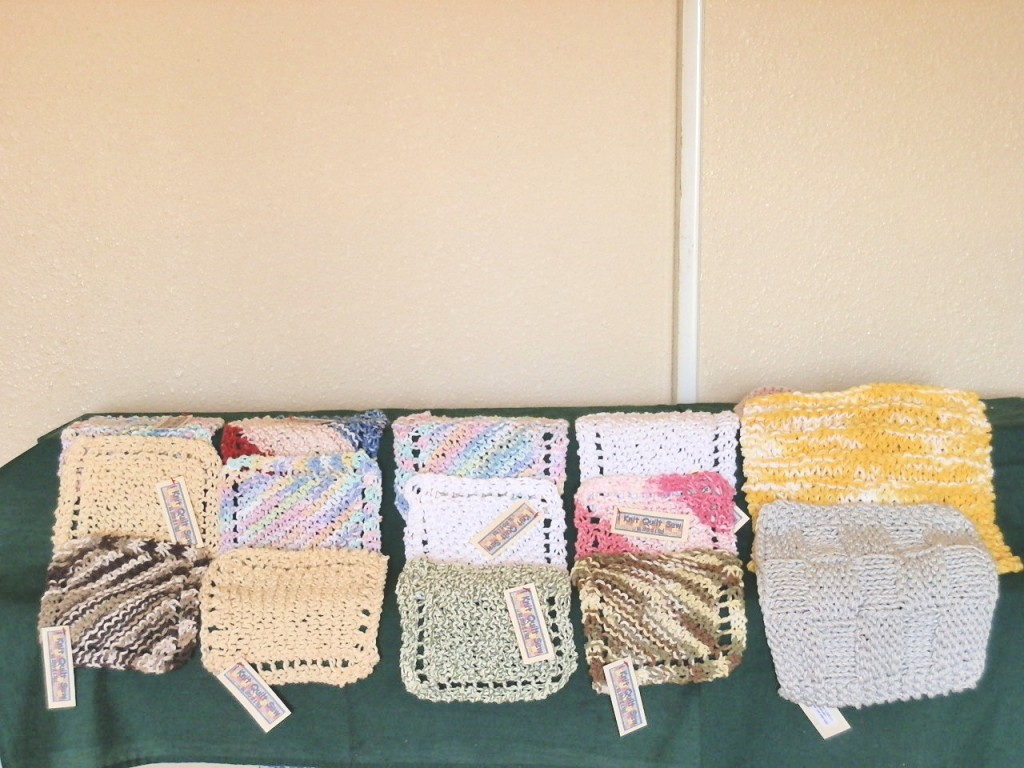 … at least I can see all the colors and shapes. Maybe I’m not interested in knitted anything, but at least I can see what’s there. One more example. This…
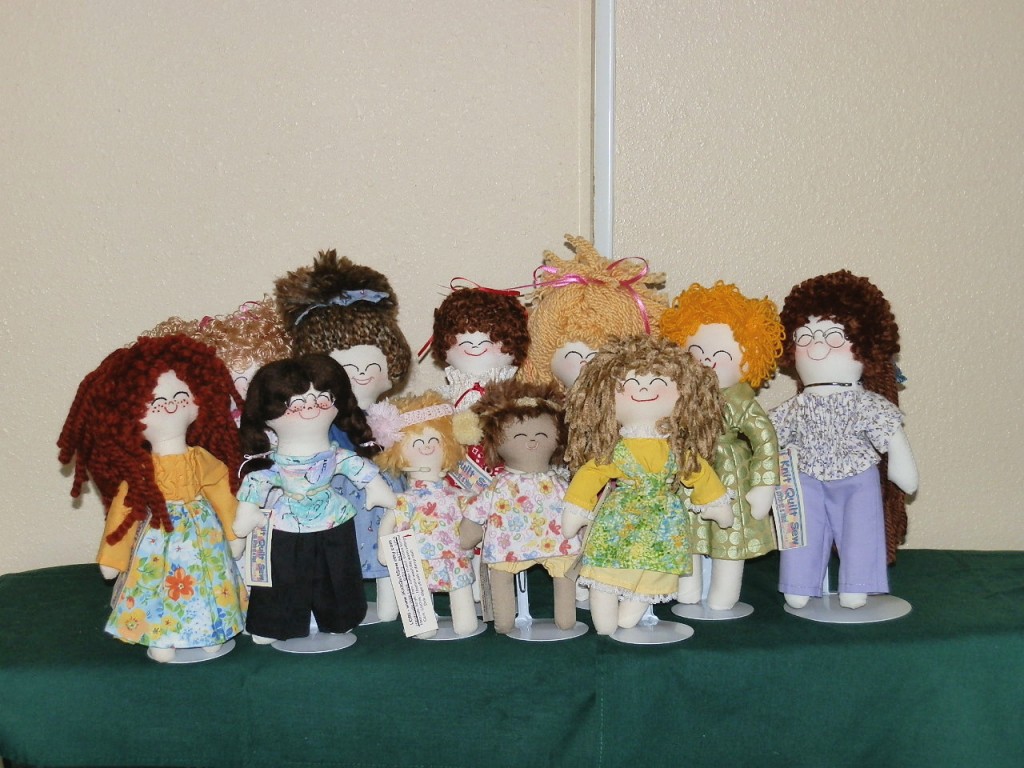 …or this
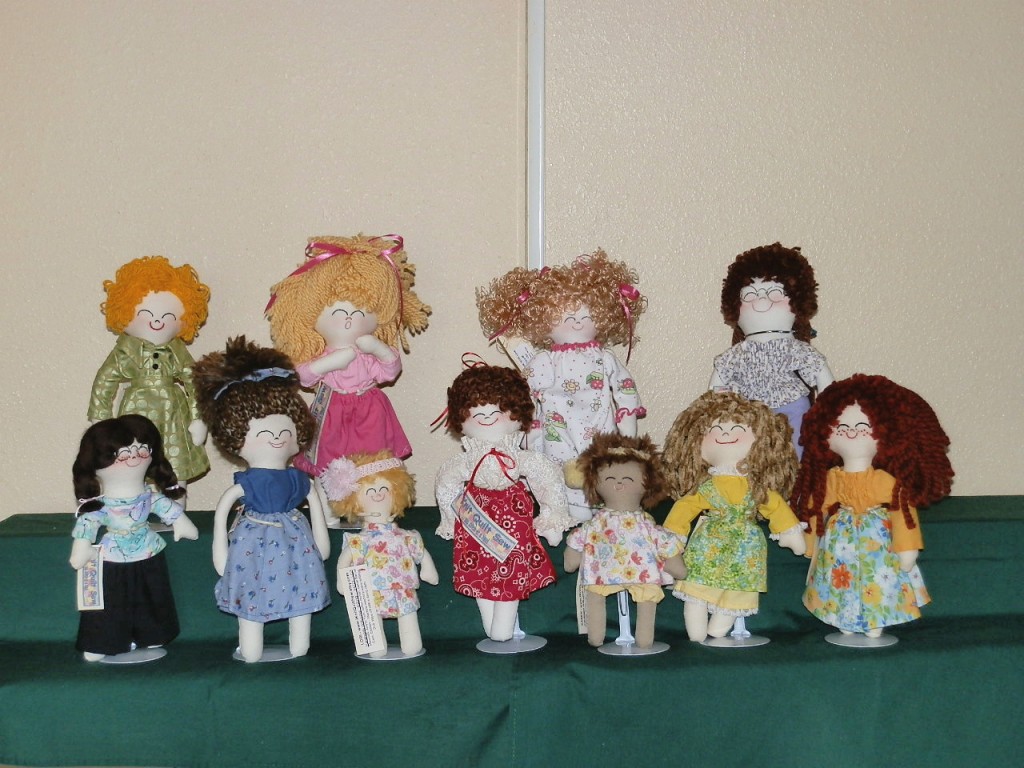
The major difference between the examples is height. It’s so important that you get you items vertical so that strolling patrons can get an idea of what your booth offers from a distance. But you don’t need to be a carpenter to achieve this. Here’s a picture of what I used to add height to the above displays…
 All it is is two chunks of 4×4 and a 1×8″ piece of pine, covered with forest green fabric! My lumber came from the scrap bin at my local home improvement store and was less than $10!
In addition to adding height in the examples, I also tried to demonstrate use of space. In the dolls example, the first photo shows them all bunched together on a flat surface. You can’t really see any of them. The second photo brings in the height component and spreads them out so that each one is visible. In a live setting, less can be more. You want your customers to be able to see each item. If you have too many items to give each one it’s own unique space, that’s okay. You can always restock when you make a sale!
Your table or tables should be covered with a consistent, inocuous color… something that will not detract from your items. I’m partial to a darker color, but there’s nothing wrong with white. This is a preference issue, and makes your displays look finished.
If this is your first show, or it’s been a while since you’ve done a show, it’s a good idea to set up your entire display. Think of this as dress rehearsal. Once you’ve done that, make a list! I can’t emphasize how important this is. What is in your dress-rehearsal booth? Product, risers, tables, table covers, canopy of course. But what else is in your booth? There has to be something to package all those purchases for your customers (bags or boxes). Are you a math wizard? There should be a calculator somewhere in this booth. You certainly don’t want to stand all day, so you need some kind of chair. Are your promotional materials somewhere (business cards and/or flyers)? Are you fasting while you sit in this booth (cooler with food and beverages). Do you do custom orders and are your forms in this booth for taking a one? What are you doing with the money you take in exchange for your items? Write all of these things down… you’ll be so happy you did!
Your dress-rehearsal booth will give you a wonderful idea of how to pack all your things to move them from where they are to the show. If at all possible, put the things on the bottom of your displays on the top of your boxes! That way, on show day, you won’t be unpacking all of your product to get to the table covers in the bottom of a box.
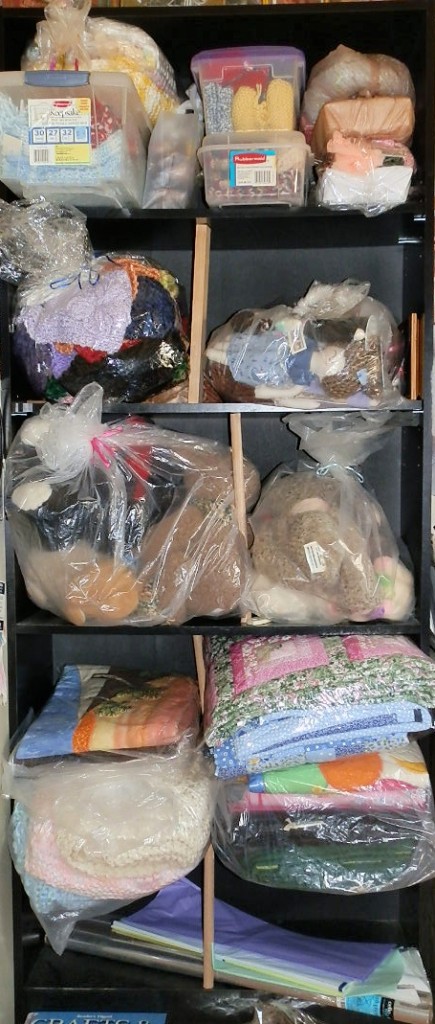
When you take your dress-rehearsal booth apart, try to store everything you’re going to need near each other. I purchased a $30 shelf unit at a big box store and it could be the best $30 I’ve spent in a long time. An added bonus is that it makes filling online orders a breeze… everything I own is together in one place!
 Cash Only or Cash/Credit?
The first couple of years I was doing shows, I took cash only. Occasionally, I’d run the risk of taking a check. I wasn’t willing to pay the monthly service charge to sign up with a company to take a credit card. It simply isn’t cost effective when you’re only going to need the service a few times a year. Lots of people will tell you that taking credit cards will double your sales at live shows. It was such a quandary.
I can say that I lost sales because I couldn’t take the customer’s plastic. But I still couldn’t justify the monthly expense of a credit card service. Then a friend of mine introduced me to Square.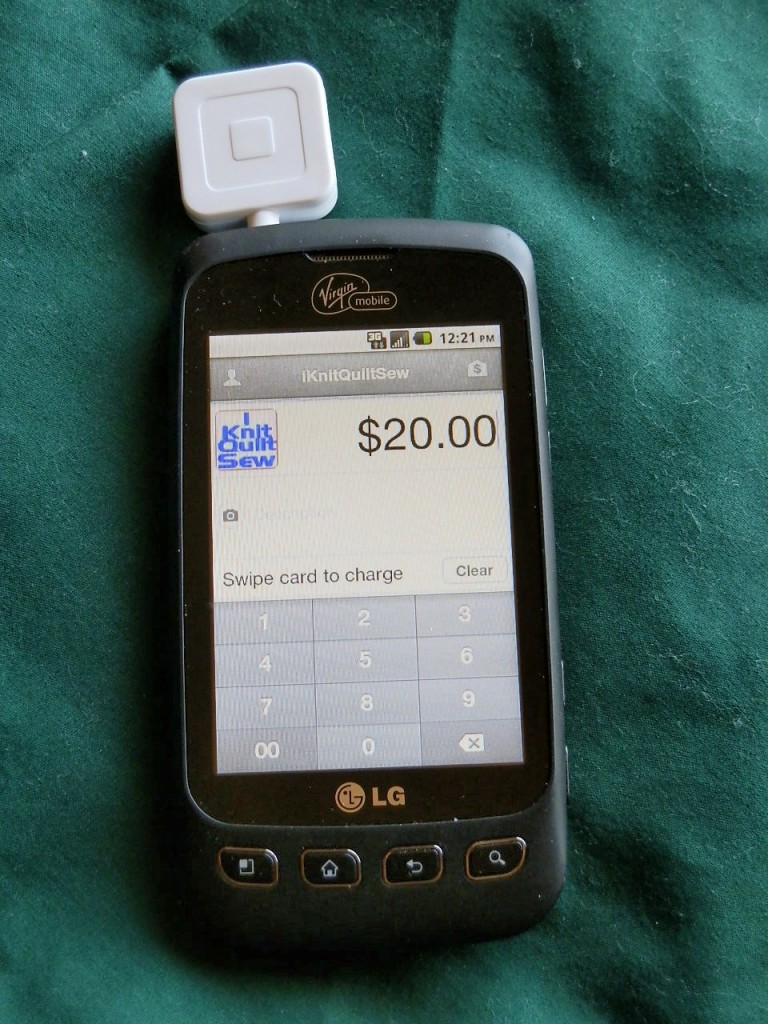 The tiny card reader (the white square) plugs into the headphone jack in your android or i-phone and turns the whole thing into a credit card terminal. You can list the total sale or individual items. The customer signs with their finger, and you can email or text them the receipt. The charge clears immediately, too. Many of my customer’s have received their text receipt before they’ve left my booth! Charges are transferred to your bank account on the next business day, minus the 2.75% fee Square charges you. There are no monthly fees, no time commitments and the reader is free! This market is expanding, too. Intuit has introduced their own service which is very similar. For more details on Square, visit their website at https://squareup.com/. For more information on Intuit’s product, visit gopayment.com.
And finally…
If you can have a wide price range of items in your booth, do it! The day of your show, you may see nothing but low-end buyers. It’s much better to sell lots of inexpensive things than nothing at all.
Do you have the ability to recreate a sold item on the spot? If so, take your tools and supplies with you. There are several advantages to this. First, it will give you something to do during slow times. Second, people visiting arts and crafts shows love to watch artisans ‘doing their thing’ and it doesn’t matter what your ‘thing’ is. Third, a patron who sees you creating may want something altered slightly to suit their own personal taste or style, netting you a sale that would have walked past had they not seen you working.
Last, and certainly not least, have fun at the show. Your enthusiasm will draw people into your booth and generate sales. Talk to everyone who pauses at your site.
By iKnitQuiltSew
Tags: art, arts and crafts shows, booth, Handmade, vendor
Posted in Information, Selling Tips
6 Responses to “Taking Your Online Store to the Street – You’ve Been Accepted! Now What?”
Leave a Reply
You must be logged in to post a comment.
Great post! I have a square to, it’s great and so easy to use.
Thanks for sharing your tips for preparing for craft shows.
A great article for first-timers AND those of us who haven’t done a show in awhile!
Love you – Mary
Good advice I have only done four craft fairs and each time I focus on improving my display. Working on my craft while I am there helps my sales. People always ask me if I make the jewelry myself and when I am sitting their working on a project it adds validity to my answer of Yes, I do.
Good tips Sandi!
Sandi,
The series is well thought-out and informative. Everyone should read this, from those starting out for the first time to the expert. You never stop learning how to improve, be more efficient, or become more organized.
I have done my fair share of shows and I would create (or at least try) a Braidlet. It made for a great conversation and gave me a chance to talk about them in-depth. And what better person to talk about their product other than the one who lives it, thinks about it, works it … the artist themselves.
Great Job and congrats on the feature!
Thank you so much for taking the time to comment, Cari… I really appreciate it!