Departments
Search
Follow Us
Tags
Latest Highlights
IBH
Finishing a Bead Necklace

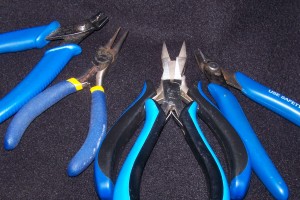 In the picture are the tools that I use to finish a necklace and make matching ear rings: crimping pliers, round nose pliers, two pair of flat nose pliers and wire cutters. These are available in a variety of makes and quality.
1. Place a crimp on the wire. I use 2 mm crimps so I can cover them with 3 mm crimp covers.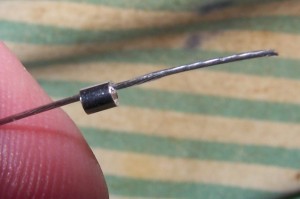
2. Place a wire guard on the wire. This will protect the wire and the jump rings from wearing against each other; allowing for longer life at the clasp.
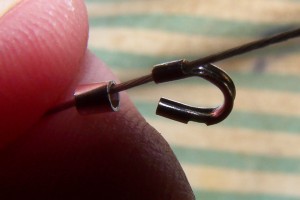
3. Pass the beading wire around the wire guard, then pass the end through the crimp. This will form the end where jump rings and clasps can be attached.
4. These are the crimping pliers. The head has two areas, the inner area has a curved side and a side with an elevated center. The outer area has two rounded sides.
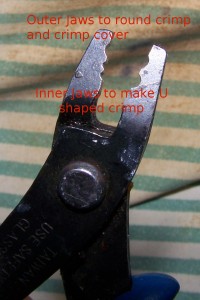
The inner portion is used to first make the crimp into an “U” shape.
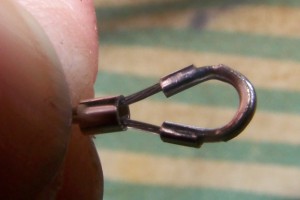
5. Ideally when you make the U out of the round crimp, there should be one wire at each end of the U.
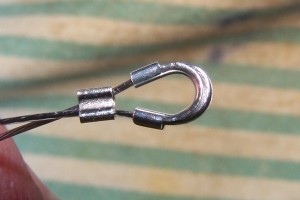
6. Then with the round outer portion of the crimp pliers fold the U together to make the shape as shown in this picture.
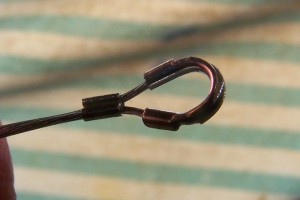
7. Place a crimp cover into the outer curved section of the crimp pliers, then insert the flattened crimp into the opening in the center of the crimp cover. Gently close the crimp cover and align the edges to cover the crimp.
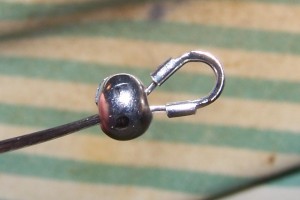
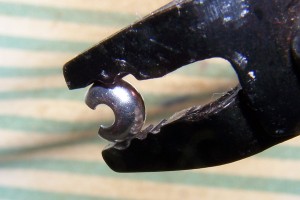
8. Pull the finished end into the beads after trimming the excess wire below the crimp cover. Be careful to select the wire portion that does not have the necklace beads on it.
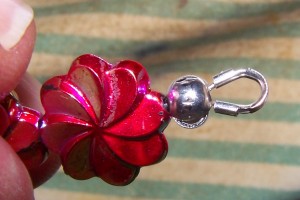
9. Using jump rings and flat nosed pliers, twist the jump ring open, then insert the end of the necklace wire guard and/or a clasp onto the jump ring and close the jump ring with the flat nose pliers.
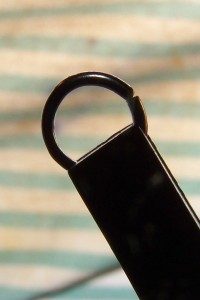
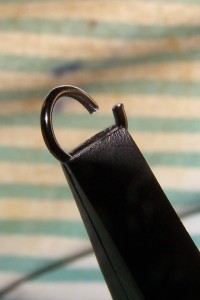
10. Repeat at the other end of the necklace so you have secured both ends of the wire with metal.
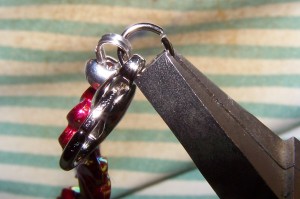
In the picture below, it shows the completed clasp for the necklace.
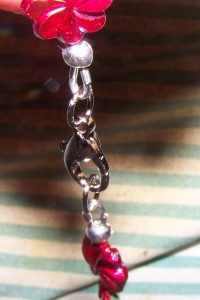
11. Here is a completed necklace with a lobster claw clasp to secure the necklace. In our shop, my wife selects the beads, arranges the bead pattern, then she gives me the strung beads to finish the ends and attach the clasp. The process used to finish the clasp section provides for a strong good looking clasp.
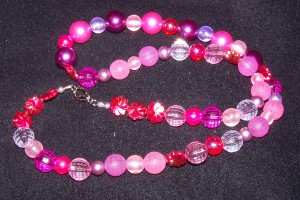
John Rasmussen of Rasmussen Gems
Tags: beaded necklace, crimp bead, crimp plier, finishing jewelry, Handmade, handmadeartists, how-to, jewelry rasmussengems, making jewelry, tutorial
Posted in Discover Handmade, Handmade Harbor, Jewelry Network, Promote Handmade, Tutorials
2 Responses to “Finishing a Bead Necklace”
Leave a Reply
You must be logged in to post a comment.


Nicely done. Clear concise and easy to follow.
Very well explained, always enjoy learning more about other crafts and tools that I haven’t used. Thanks.